

Introduction
This tutorial will walk you through the process of configuring Atmel Studio such that you can directly Program Arduino from Atmel Studio. This will let you choose Professional grade IDE ie. Atmel Studio for your programs and still use a Maker / Prototyping Hardware ie. Arduino for Testing or Deployment.
To Flash Arduino from Atmel Studio, you need to install Arduino IDE and Drivers before. Please follow these steps to install if you haven’t.
https://mendupmindcode.blogspot.com/2021/12/installing-arduino-drivers.html
What You Will Learn
- How to flash Arduino from Atmel Studio using bootloader?
- How to program Arduino UNO using COM Port from Atmel Studio?
- How to program Arduino NANO using COM Port from Atmel Studio?
- How to flash Arduino boards from Atmel Studio?
Configuration Steps
Time needed: 5 minutes.
Configuration Steps for Atmel Studio for Flashing or Programming an Arduino Board
- Open Atmel Studio
Open your installed Atmel Studio IDE.

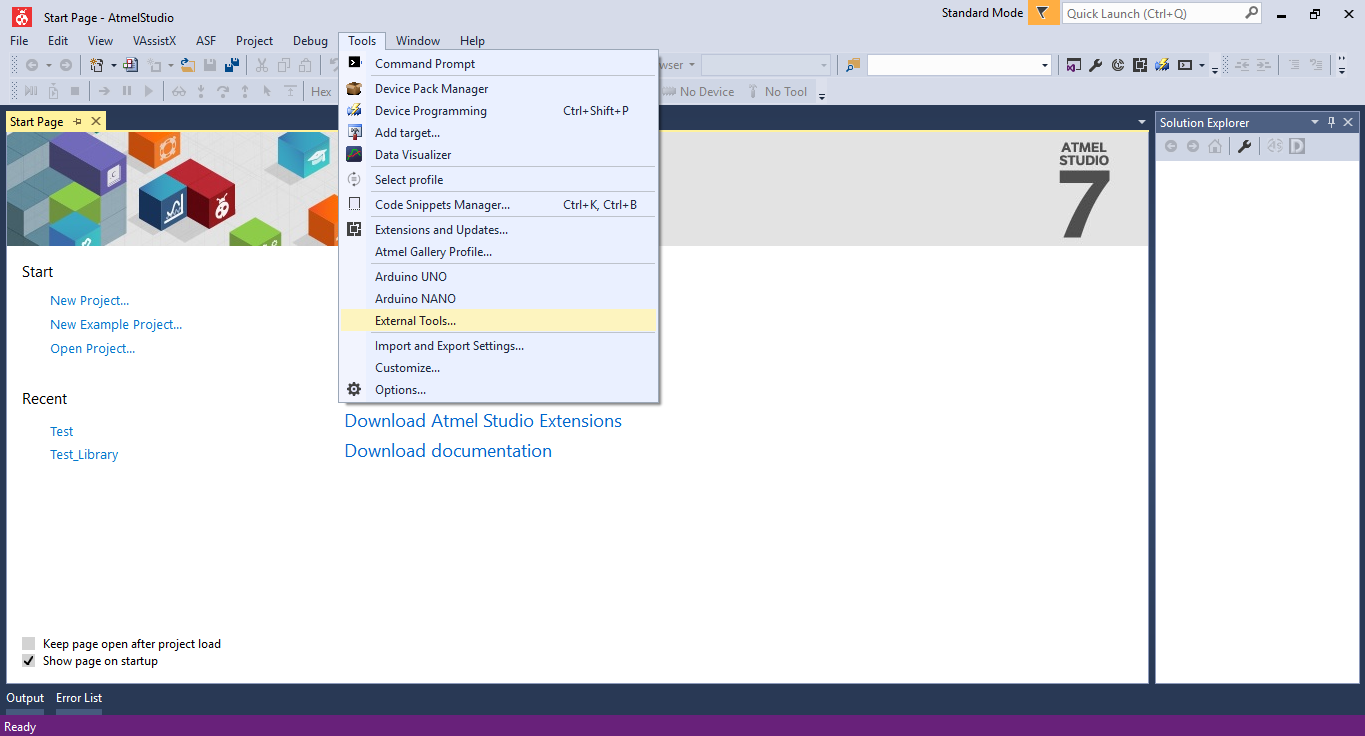
- Go to External Tools Menu
On the Menu Bar go to Tools -> External Tools
- External Tool Window
You should see a window like this but will be empty for you. I had already added two commands for Arduino UNO and Arduino NANO.
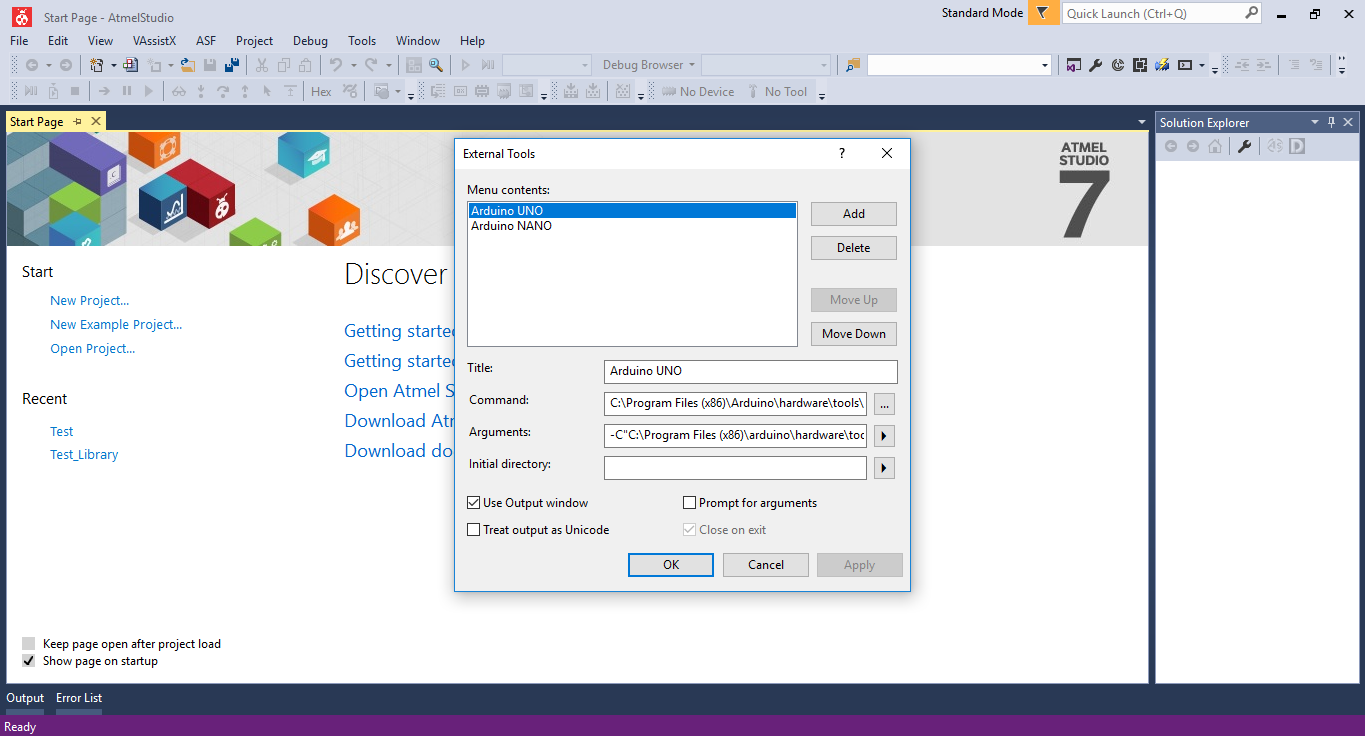
- Add a new Tool for Arduino UNO
Click ‘Add’ to add a new Tool. And fill the text boxes as below.
Title:Arduino UNO
Command:C:\Program Files (x86)\Arduino\hardware\tools\avr\bin\avrdude.exe
Arguments:-C"C:\Program Files (x86)\arduino\hardware\tools\avr\etc\avrdude.conf" -v -patmega328p -carduino -PCOM10 -b115200 -D -Uflash:w:"$(ProjectDir)Debug\$(TargetName).hex":i
Select'Use Output Window'
You can give any Title you want. The Command should have the path to avrdude.exe that will be in the location where you have installed the Arduino IDE. The Arguments should have the 3 most important parameters in it, the Microcontroller which is dependent on the Arduino board you are using, COM Port, and Baud Rate. COM Port system dependent and can be determined from Device Manager. Baud Rate should be 115200.
Arduino UNO / NANO Microcontroller >-patmega328pArduino MEGA Microcontroller >-patmega2560
- Add a new Tool for Arduino Nano
Click ‘Add’ to add a new Tool. And fill the text boxes as below.
Title:Arduino NANO
Command:C:\Program Files (x86)\Arduino\hardware\tools\avr\bin\avrdude.exe
Arguments:-C"C:\Program Files (x86)\arduino\hardware\tools\avr\etc\avrdude.conf" -v -patmega328p -carduino -PCOM5 -b57600 -D -Uflash:w:"$(ProjectDir)Debug\$(TargetName).hex":i
Select'Use Output Window'
You should notice that the microcontroller is the same as in Arduino UNO as both the board uses the same MCU. The COM Port is changed as every new board will get a new COM Port assigned by your PC. You have to check in Device Manager to which COM Port is assigned for your Board. The Baud Rate for Arduino NANO is 57600. - Build Your Program
It usually takes few seconds to get the build done.

- Flash Arduino and Test
Go to Menu -> Tools and Select the Tool you want to Test.
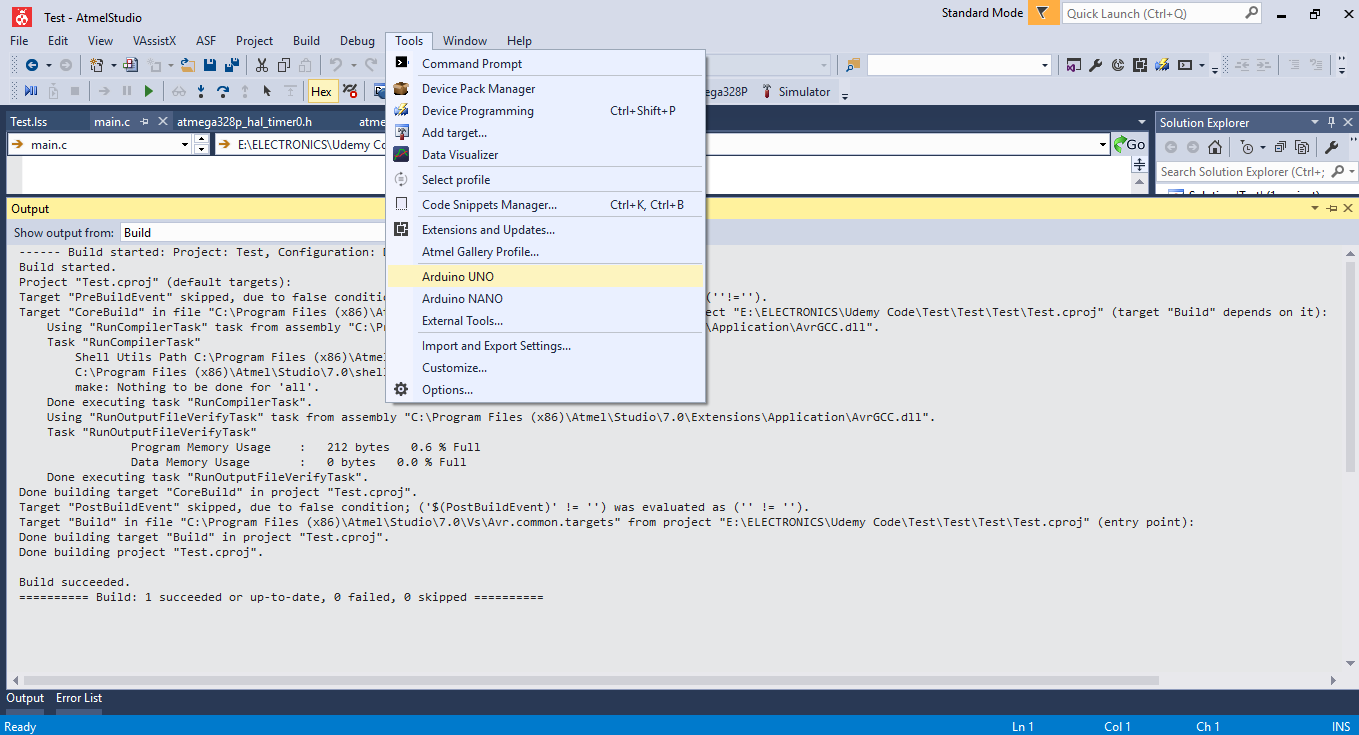
- If Everything is fine you should get a message like this
It usually takes few seconds to flash the Arduino.

Post a Comment